Getting ready to open
The checklist on your app's Home page: what each step does, which ones you need, and which can wait.
How the checklist works
Getting ready to open sits on your Home page until you open. Each step says about how long it takes, and it ticks itself once your app can see that it's done.
- Only two steps are needed: Your app is set up, which ticks itself when your first build is live, and Get paid.
- Everything else can wait. Do those steps now or later, or use the button that sets a step aside, such as Skip for now.
- Some steps only show when they fit your app. You may not see all of the ones below.
- The words follow your business. If you say "clients" rather than "customers", so does your checklist.
Get paid Needed to open
Choose how you'll take money. You can change your mind later.
- Set up card payments: choose Connect with Stripe and follow Stripe's steps. When you come back, choose Refresh. If you stop partway, Finish on Stripe picks up where you left off.
- Cash and checks for now: this ticks the step, and you can add card payments any time.
Start early. Stripe takes a few days to check a business, so you can begin while your first build is being checked.
Your look
Choose Add your logo and colors so your customers know it's you, then Save branding. Your logo, name and colors show across your app. Or choose Skip for now.
Invite your staff
Everyone who works with you gets their own sign-in.
- Choose Invite someone.
- Enter their details. You can choose what they can do now or after they join.
- Choose Send invite. They get an email with a link to set their password.
Working alone? Choose Just me for now. To add or remove someone later, use Users in your app.
Bring in your customer list
If you keep your customers in a spreadsheet, you don't need to type them in again.
- Share the spreadsheet with Gregory, using the paperclip button. It's kept for you until you bring it in.
- On the checklist, choose Bring it in.
- Pick the list, and where it goes in your app under It goes into.
- Check that each of your columns goes to the right place. The app suggests a match, and you can change any of them or choose Don't bring in.
- Look over the preview, which flags any problems, and confirm. The rows that are ready come in.
No list? Choose Start fresh.
Not yet: children's records. These can't be brought in yet, because the protections for children's data aren't ready. Bring in the adults' records first.
Tell your customers
Choose Ask Gregory to draft it. He writes a short announcement about your new app, and you send it from your own email. Then choose Told them to tick the step.
Your own address
This one is optional. Your app already has its address at ask-gregory.com. If you have a domain, it can move to app.yourbusiness.com, and the domain itself is kept for your website.
- Choose Ask Gregory, and tell him your domain.
- Choose Show me what to add. You'll get one or more records to add in the DNS settings where you bought your domain.
- That's all. We check every few minutes, and your app moves by itself once the records are in. The old address forwards to the new one.
Your email keeps working. Leave your email settings (MX) as they are.
Happy with the address you have? Choose Keep this address.
Welcome your customers
Judy, your front desk helper, is an AI. She can email each new customer a welcome you approve once, and say goodbye when one leaves. If your app has forms, she can follow those up too.
Choose Ask Gregory to set it up, or Not now. If you change your mind later, open Judy and look under Add jobs.
Set up your front desk
This shows if your app has forms for customers to fill in at your front desk, on a tablet.
- Choose Set up the front desk, and give it a password and a staff PIN.
- Open it on the tablet, and add it to the home screen.
That page also shows how to lock the tablet to the front desk. If you'd rather not use a tablet, choose We'll only email forms. You can set it up any time in Settings → Front desk.
Your email
Your app has its own email address, and anything sent there shows in your Inbox. You have two ways to use it:
- Give out your app's address: copy it from Set up your email, and put it wherever customers will find it.
- Keep your own address: choose Set up forwarding… and follow the steps for Gmail, Outlook or another service. Your customers won't notice anything, because your email service sends your app a copy of each email.
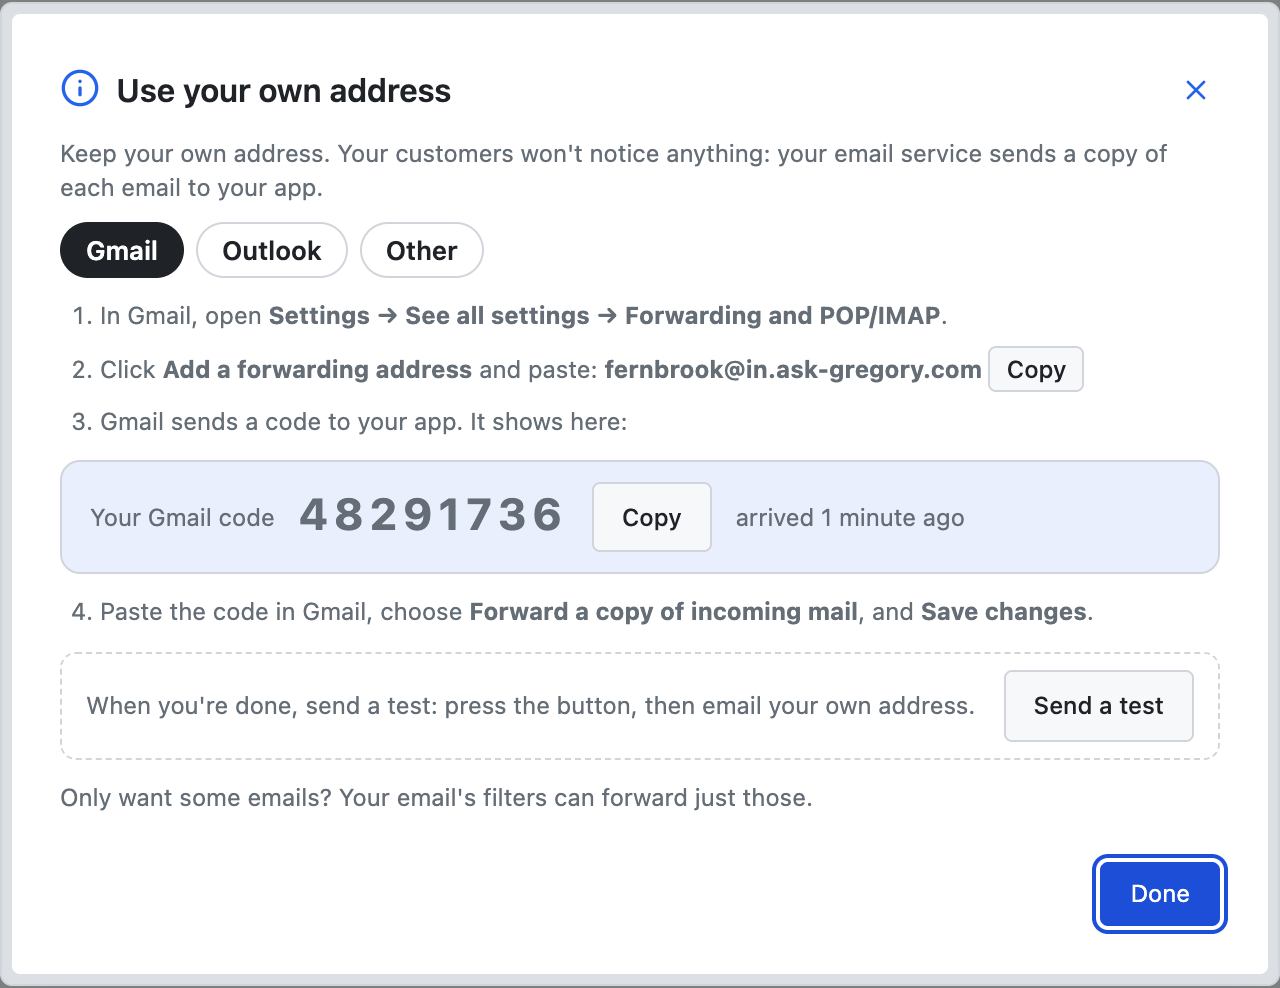
When you're done, choose Send a test, then email your own address. The step ticks itself when the first email arrives.
If you only want some emails in your app, your email service's filters can forward just those.
We're open
Once the two needed steps are done, the We're open button works. Press it whenever you like. The checklist goes away, and Gregory is still there whenever you need him.
If you're stuck
Ask Gregory. He answers questions about your app and tells you where to do things, and questions are free. You can also email support@ask-gregory.com.